Order Books (Buy and Sell)
Order Books
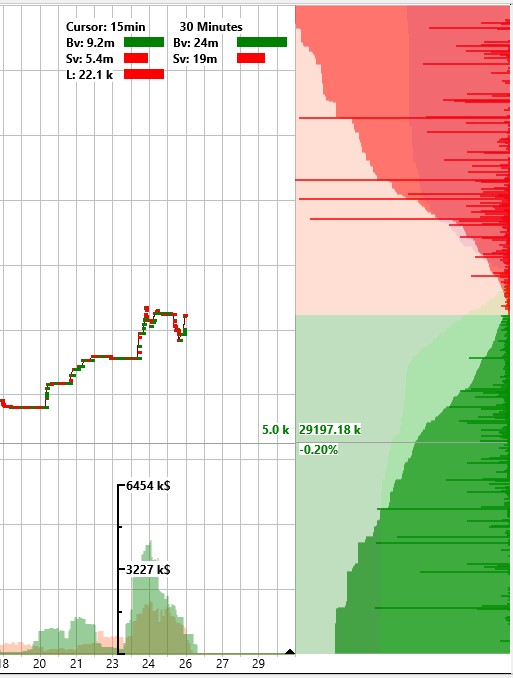
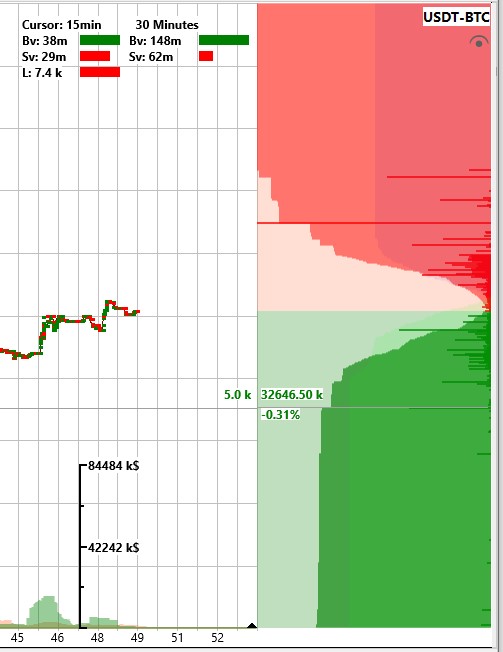
To the right of the chart are the order books.
At the top is the red Order Book ASK — this displays limit sell orders.
At the bottom is the green Order Book BID — this displays limit buy orders.
The area between the edges of the order books is called the price spread.
When you hover the cursor over the order book, the horizontal cursor line shows the volume at the selected level and the percentage distance between the current price and the cursor position. This allows you to quickly assess the volume in the order book at a given distance from the price.
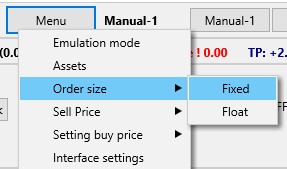
In addition, when selecting via "Menu → Order Size → Fixed", you can enable fixed buttons for Buy orders, in which case the cursor line will also display the current fixed order size selected by the user.
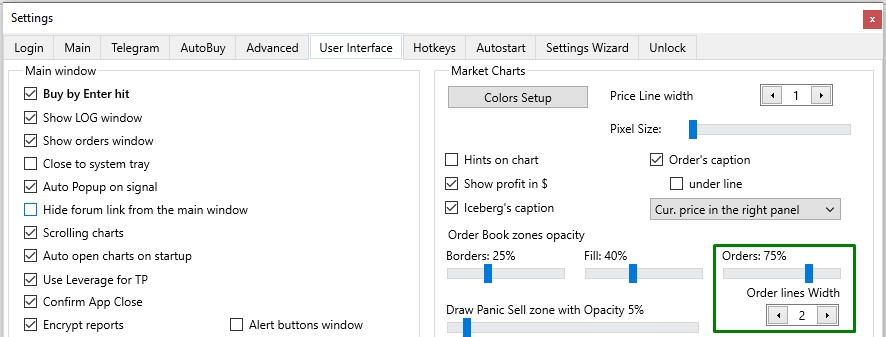
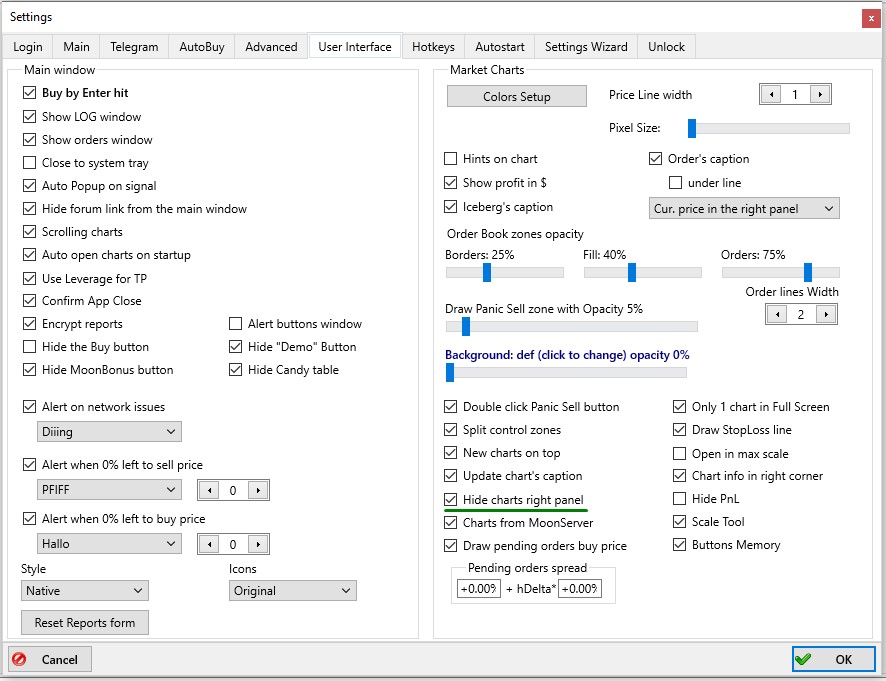
Also, on the Settings → User Interface tab, using the "Orders" and "Order lines Width" parameters, you can configure the display of limit orders and their thickness in the form of horizontal dashes in the order book.: the longer the dash, the larger the volume of the limit order.
If you are trading long, it is recommended to place Buy orders slightly above large green limit orders to fill your order faster. A Sell order is best placed below a large red limit order ("below the wall") to ensure faster execution, and a Stop-Loss should be placed beyond a large green limit order.
Right Control Panel
To the right of the order books is the control panel with additional buttons and information.
You can keep this panel always open or set it to auto-hide to expand the trading workspace with charts.
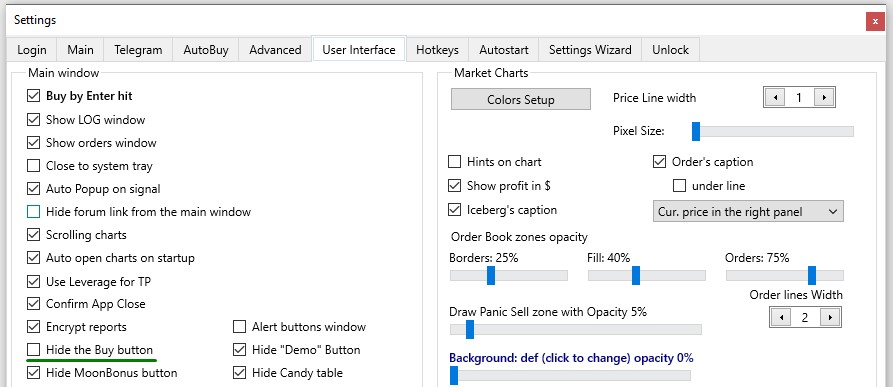
To enable auto-hide, go to Settings → User Interface and check Hide charts right panel — the right panel will then automatically collapse.
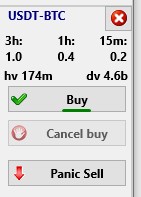
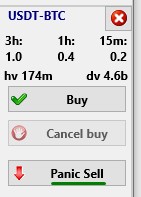
In this mode, at the top of the red order book area, the trading pair (e.g., USDT) and the coin name (e.g., BTC) will be displayed in the format USDT-BTC. If you left-click on it, the chart of that coin will open in the terminal, if you right-click, the chart of that coin will be added to the active chart window.
Below that is a button: left-click opens the right control panel, which stays open while the cursor is within its area. Right-click on the button closes the chart of the coin.
If the right control panel is open and you move the cursor outside its area (e.g., over the chart), the panel will auto-hide.
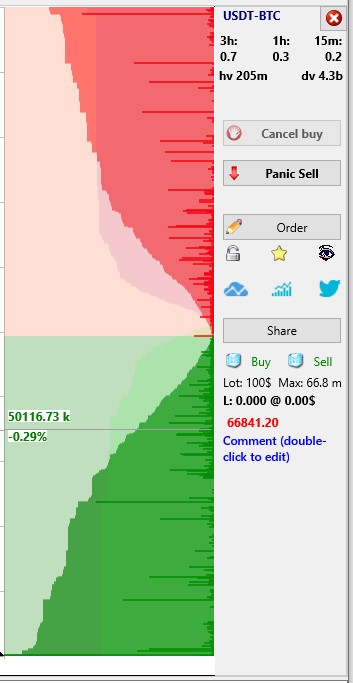
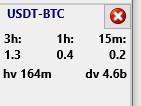
When the right control panel is open, the top of the right panel shows the trading pair (e.g., USDT) and the coin name (e.g., BTC) in the format USDT-BTC.
If you left-click on it, the chart of that coin will open in the terminal. If you right-click on it, the chart of that coin will be added to the active chart window.
Below this, price delta values for the coin over 3h, 1h, and 15m are shown in percentages. These values are always positive. If the right panel is hidden, these values are shown on the chart itself in the upper left corner, on the second line.
Below are the hv (1-hour volume) and dv (24-hour volume) values for the coin. If the volume number includes a letter k, it means thousands; m means millions.
Additional delta and volume data for other intervals can be viewed in the MarketsTable, accessible by clicking the Show Markets button.
Buy Button
The Buy button appears on the control panel if on the tab "Setting → User Interface" unchecked "Hide the Buy button".
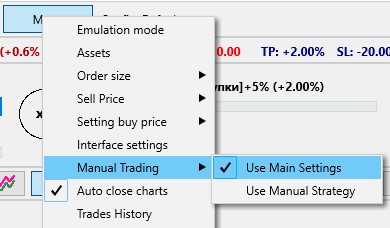
The Buy button allows you to buy a coin in accordance with the settings in the main terminal window for the “Buy for [price before pump started] ±X%” slider, which appears in the main terminal window if you select “Menu → Manual Trading → Use Main Settings”.
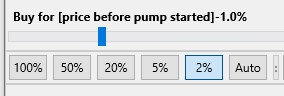
If the slider is set to a negative value, a Buy order will be placed at the specified percentage below the current price, into the Order Book BID.
If the slider is set to a positive value, the Buy order will be placed into the Order Book ASK and executed as a market order.
Cancel buy Button
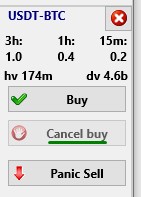
The Cancel buy button cancels all active Buy and Pending orders for the selected coin.
If the Buy orders have already been filled and Sell orders are in place, and there are no other limit Buy orders for the coin, the Cancel buy button becomes inactive.
There are several ways to cancel Buy orders:
-
Using hotkeys, configured in Settings → Hotkeys:
-
In the Cancel buy field — cancels all Buy and Pendingorders for the coin whose chart is currently maximized
-
In the Cancel ALL buys field — cancels all Buy and Pendingorders for all coins in the terminal.
-
Through the order menu, the following cancel options are available:
-
Cancel all pending — cancels all Pendingorders, leaving active Buy orders unchanged
-
Cancel all real buys — cancels all active Buy orders, leaving Pendingorders in place
-
Cancel ALL BUYs — cancels all orders on all coins, including both Buy and Pendingorders
-
In the order window, click the red cross icon next to the order and confirm cancellation.
-
To cancel a specific Buy order, hover over it, right-click, and select Cancel in the menu.
-
You can also press and hold the Tab or Delete key, then move the cursor over the orders you want to cancel — they will be canceled as you hover over them.
Panic Sell Button
The Panic Sell button closes all positions at market price by moving all Sellorders to the opposite order book: when closing long positions, Sell orders are instantly moved to the Order Book BID; when closing shorts — to the Order Book ASK. You can configure activation to require a single or double click in Settings → User Interface by enabling the checkbox Double-click on Panic Sell button.
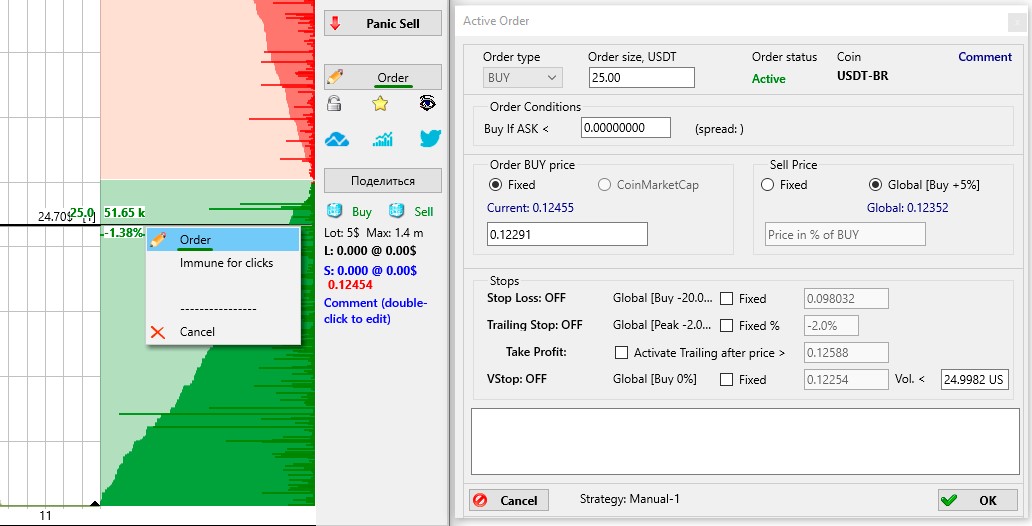
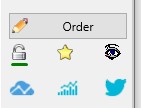
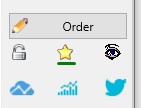
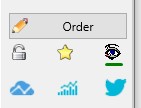
Order button
The Order button opens the Order window where you can configure order parameters.
You can also open the Active Order window by right-clicking on the order line in the order book area and selecting "Order" from the menu.
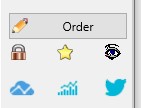
Lock button
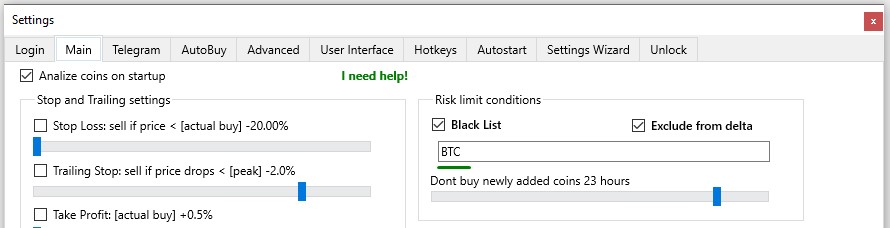
The Lock button is used to manually add a coin to a permanent or temporary blacklist and may appear as follows:
-
- The grey padlock with an open bracket indicates that the coin is not on the blacklist.
-
- The yellow padlock with a closed bracket means that the coin is permanently blacklisted in the Black List field on the Settings → Main tab. This prohibits strategies from giving detections and placing orders on this coin. To remove a coin from the permanent blacklist, left-click on the yellow lock so that it turns gray again or delete this coin from the Black List field on the Settings → Main tab.
-
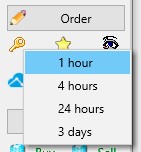
- The yellow key indicates that the coin has been added to a temporary blacklist. To do this, right-click on the Lock icon and select one of the four time options from the menu: 1 hour, 4 hours, 24 hours or 3 days. The log will then contain an entry specifying the coin, the fact that it has been blacklisted, the date (MM.DD) and the time (hh.mm.ss) when the block ends.Example of a log entry when using the temporary blacklist: "market does not meet the conditions: Market BTC BlackListed until 15.03 19:07:39"
Yellow Star button
The Yellow Star (Fav) button adds the coin to your favorites list for quick access later.
Eye button
The Eye button opens the chart of the coin in the active chart window.
TradingView button
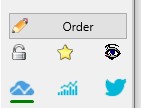
The TradingView button opens the chart analysis and overview for the pair on the TradingView website.
Charts button
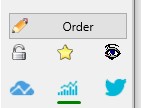
The Charts button opens the candlestick chart for the coin on the TradingView site, allowing you to view historical data on various timeframes.
Twitter button
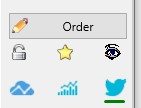
The Twitter button opens the official Twitter account page for the coin, where you can find news and announcements.
Share Button
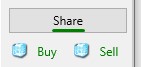
If you find a coin interesting for the community, you can share it by left-clicking the Share button. In this case, the Moonbot terminal will automatically send a message with the coin name, your ID, and your Telegram username to our Telegram channel. You can set your Telegram username in Settings → Login.
To use the coin sharing feature and allow the terminal to read from the @MoonInt channel, you must also agree to send debug data to our server. To confirm, go to Settings → Login and check the box Agree to send debug data to bot’s server.
More details on configuring data sharing are available at: 🔗 Social Trading >>>
Right-clicking the Share button opens the Share market window, where you can set up sharing information about coins to your own Telegram channel or activate the trust management feature — allowing one terminal to control others (placing Buy orders, buying and selling coins).
More about the trust management feature: 🔗 Trust Management Via Telegram >>>
Iceberg Mode Buttons
Below are two buttons that enable or disable iceberg mode for Buy and Sell orders respectively.
You can also configure iceberg mode in Settings → Advanced → Engine Settings:
-
If the Iceberg Buys checkbox is enabled or the Iceberg Buy button is pressed, a special iceberg mode for buying is activated. In this mode, only 10% of your total Buy order will be visible in the order book. After the first 10% is filled, the next 10% is automatically placed, and so on, until the full Buy order is completed.
-
If the Iceberg Sells checkbox is enabled or the Iceberg Sell button is pressed, the iceberg mode for selling is activated. In this case, only 10% of your total Sell order will be visible in the order book. After the first 10% is sold, the next 10% is placed automatically, and so on until the entire Sell order is filled.
For example, if you place a $100,000 order in iceberg mode, other traders will initially see only a $10,000 part in the order book. Once it is filled, the next$10,000 part will appear, and so on until the full order is executed.
You’ve probably noticed small “walls” in the order book that hold the price in place. These can be signs of iceberg orders, which are difficult to break through without significant volume.
The iceberg order mode is convenient for working with large volumes, allowing you to avoid alarming other market participants with large orders (“walls” in the order book), remain unnoticed, and maintain price levels.
💡Note: iceberg orders are supported on Binance, Bybit, and Gate, but do not work on HTX. For trading on HTX, it’s better to use grids with a small step and small-size orders to avoid attracting attention.
Lot: and Max: Information
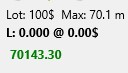
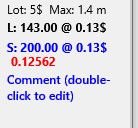
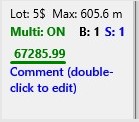
Below that, you’ll see the Lot value in $ — this is the minimum lot size for the selected coin. You cannot place an order below this value in the Moonbot terminal or on the exchange. Minimum lot sizes vary between coins, so it's important to monitor this parameter when configuring strategies.
To the right is the Max value — the maximum lot size in $. You cannot place orders above this amount in the Moonbot terminal and on the exchange.
Information Multi:, B:, S: or L:, S:, @
-
For the Moonbot Spot terminal
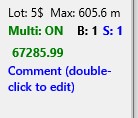
Multi: ON or Multi: OFF displays the status of enabling or disabling multiorder mode.
B: N - shows the number of N Buy orders placed on this coin.
S: N - shows the number of N Sell orders placed on this coin.
-
For the Moonbot futures terminal
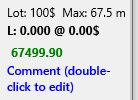
L: number of coins @ $ volume for a long position
S: number of coins @ $ volume for a short position
If you right-click on this line, an additional menu will open.
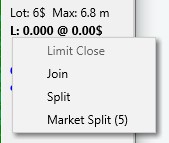
Limit Close - if there is an open position on the exchange, but it is not in the terminal for some reason, then when this option is selected, a Sell order will be placed in the terminal to close the current position.
Join - join Sell orders.
Split - split the Sell order into 3 equal parts, if the minimum order limit on the coin allows.
Market Split (5) - sell a position in 5 randomly sized market shares on all exchanges except the Hyperliquid exchange, as it has a market of orders, so orders will be placed in the spread of the order book.
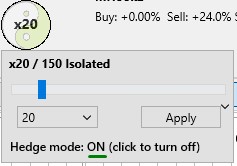
If you enable hedge mode in the futures circle menu, you can open both long and short positions simultaneously, and both the long and short lines will be displayed.
Current Coin Price
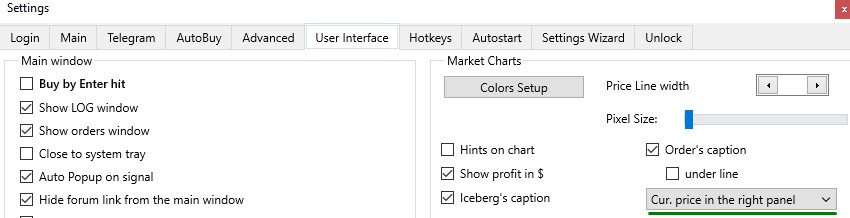
You can adjust the position of the current coin price in the "Settings → User Interface" tab in the menu, next to the "Order’s caption" option, below the "under line" option.
When selecting, the following coin price display modes are available in the Moonbot terminal’s main window:
-
Cur. price in the right panel — current coin price is shown on the right panel of the main Moonbot window
-
Cur. price in the spread — current price is shown in the spread between the Order Book BID and Order Book ASK in the main Moonbot terminal window
-
Don’t show cur. price — current coin price is hidden from both the right panel and the spread area in the main Moonbot terminal window.
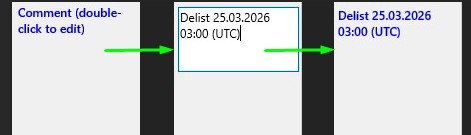
Comment Field (double-click to edit)
The Comment (double-click to edit) field is intended for a brief comment about the coin.
This field may display the hint Comment (double-click to edit) or remain empty if a comment was previously removed.
To add or edit a comment, hover your mouse over this hint or the field itself until the pointer changes to a paper-and-arrow icon, then double-click — a window will open where you can enter your comment. After typing your text, click anywhere on the right control panel or on the chart — the window will close, and the comment text will turn blue (in light theme) or yellow (in dark theme).
If you delete the comment, the Comment (double-click to edit) text will automatically disappear.
After restarting the Moonbot terminal, the Comment (double-click to edit) hints will no longer be displayed on any coins — even those that didn’t have their comments edited. This is intended to avoid visual clutter after you've used the field at least once.
Coin comments are saved in a text file named CoinsComments.txt, located in the data folder.
Entries are listed one per line in the format: COIN=comment.
If you clear the contents of this file and restart the Moonbot terminal, all comments will be removed and the Comment (double-click to edit) hint will reappear for all coins.
You can also manually edit the CoinsComments.txt file, and after launching the terminal, all your changes will appear on the corresponding coins.
Bitcointalk Forum Link
Below the time scale on the chart, you can display a line with a link to the forum: 🔗https://bitcointalk.org/index.php?topic=2234198 — where you can leave your feedback about using the Moonbot terminal. You can hide this line in the terminal by going to Settings → User Interface and checking the box Hide forum link from the main window.