Connecting to the Bitget exchange
We recommend registering an account on the Bitget exchange using the Moonbot referral link:
🔗 https://www.bitget.com/expressly?vipCode=2MOON.
For all accounts registered through this link, an automatic cashback of 20% on spot and futures trading applies, and the option to activate a 14-day free trial period of the PRO version becomes available.
After activating the PRO version using the Moonbot referral link, the following bonuses will be available to you:
-
BGB auto-buy option;
-
MoonHook strategy;
-
Price emulation on the chart using the Pencil tool;
-
Chart monitoring module in separate windows;
-
MoonKernel module — client-kernel mode for faster manual trading.
The Moonbot terminal for Bitget supports both spot and futures markets.
When using the Moonbot terminal for Bitget on a dedicated server, it is recommended to select the “Japan” (Tokyo) location for better ping.
Activation of subaccounts is performed through the Moon Credits window (instructions are provided below), and this requires 500 Moon Credits — for activating each subsequent subaccount. Moon Credits are available only to users of the PRO version of Moonbot.
Instructions for Creating API Keys in a Bitget Exchange Account
After logging into your Bitget exchange account and completing verification:
1) Open the futures trading chart in the web interface Binance Futures → USDT-M Futures;
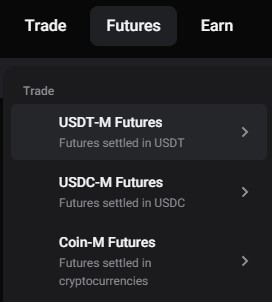
2) Follow the yellow prompts on the screen and complete the test for access to futures trading.
You also need to transfer a small amount to the futures account in your Bitget exchange account;
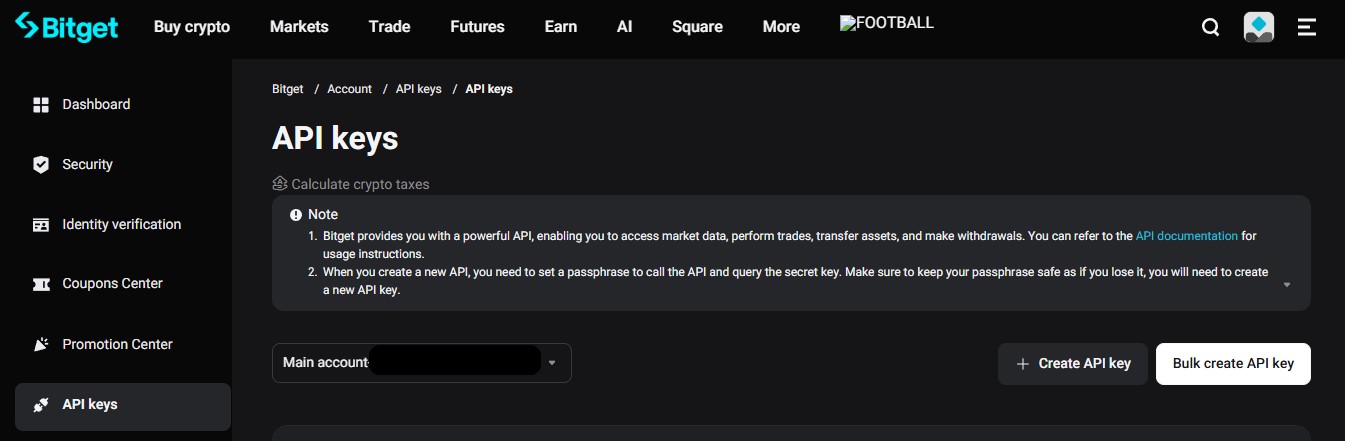
3) Go to Account → API Keys and click the Create API Key button;
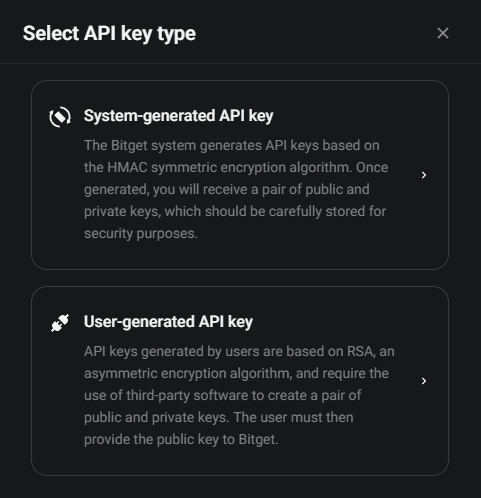
4) In the Select API Key Type window, choose System-generated API Key to create HMAC keys, or User-generated API Keys to create RSA keys;
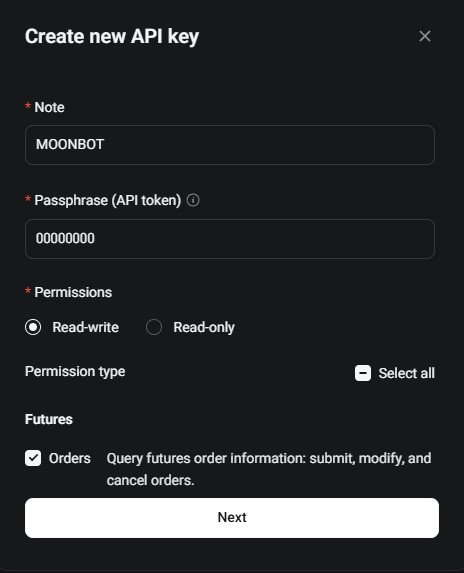
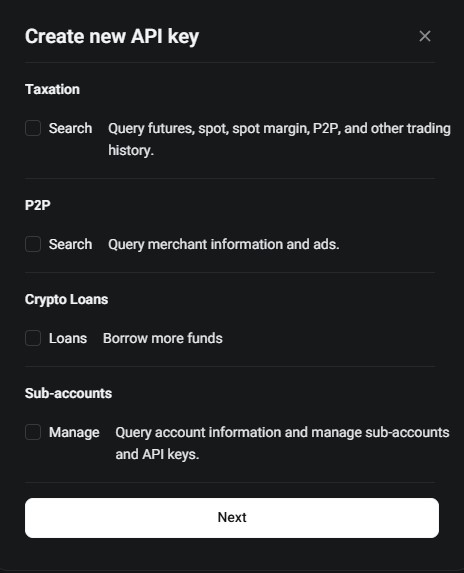
5) In the Create New API Key window:
-
In the Notes field, enter the name of the API keys, for example, MOONBOT;
-
In the Passphrase field, enter 00000000 (eight zeros);
this password is not used by the Moonbot terminal and is only required to fill out the form when creating API keys on the exchange side; -
Select the Read-Write option;
-
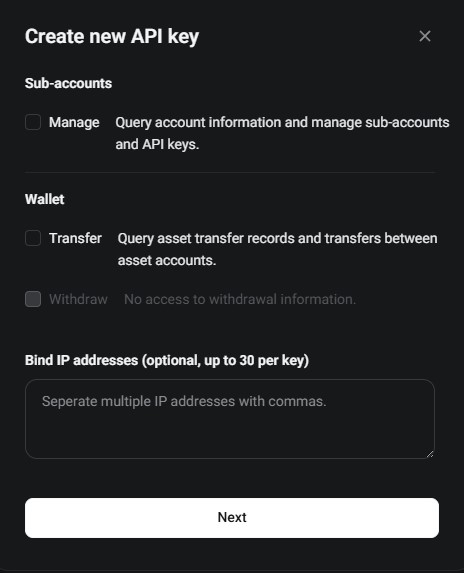
In the Futures section, enable Orders and Funds checkboxes;
-
In the Spot section, enable Trading;
-
In the Bind IP Address field (optional, each key can be bound to up to 30 IP addresses), you can specify a comma-separated list of whitelisted IP addresses allowed for trading;
-
Click the Next button.

6) In the Security Verification window, complete the required verification procedures, enter the code sent to your email, and the code from Google Authenticator or a similar verification app to confirm the creation of API keys.
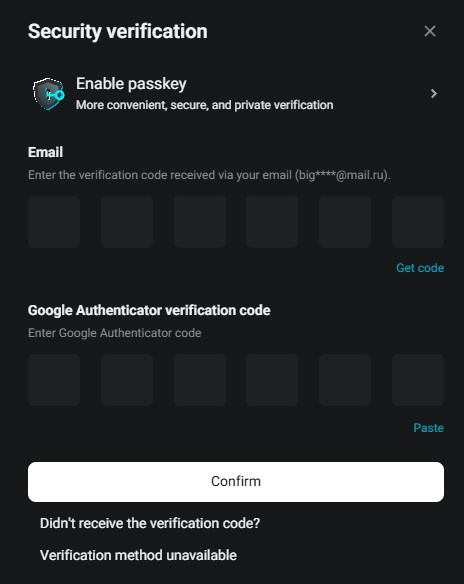
After completing these steps, the API keys will be successfully created.
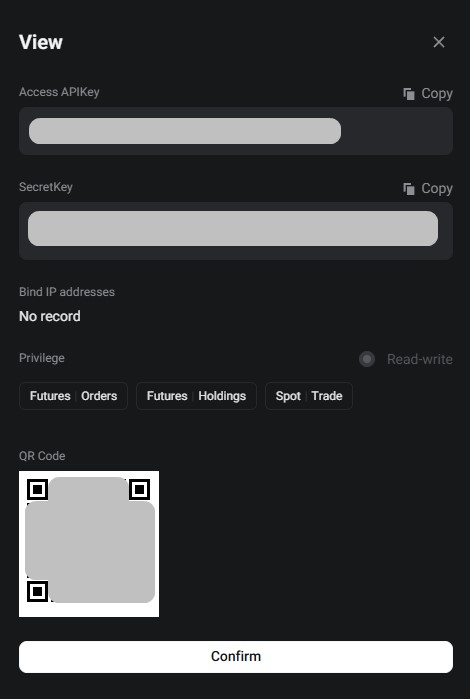
⚠️ Important! Save the API Key and Secret Key in a text file on a USB drive or write them down on paper — these keys will be required to register them in the Moonbot terminal (on the Settings → Login tab).
How to Activate API Keys in the Terminal for the Bitget Exchange
-
Create API keys on the Bitget exchange website for the main account or a subaccount;
-
Copy the folder with your main PRO terminal for another exchange into a new folder and launch the terminal;
-
Go to Settings → Login, in the Exchange field select Bitget Spot or Bitget Futures and click Apply;
-
In Settings → Login, register the API keys from your main account or subaccount;
-
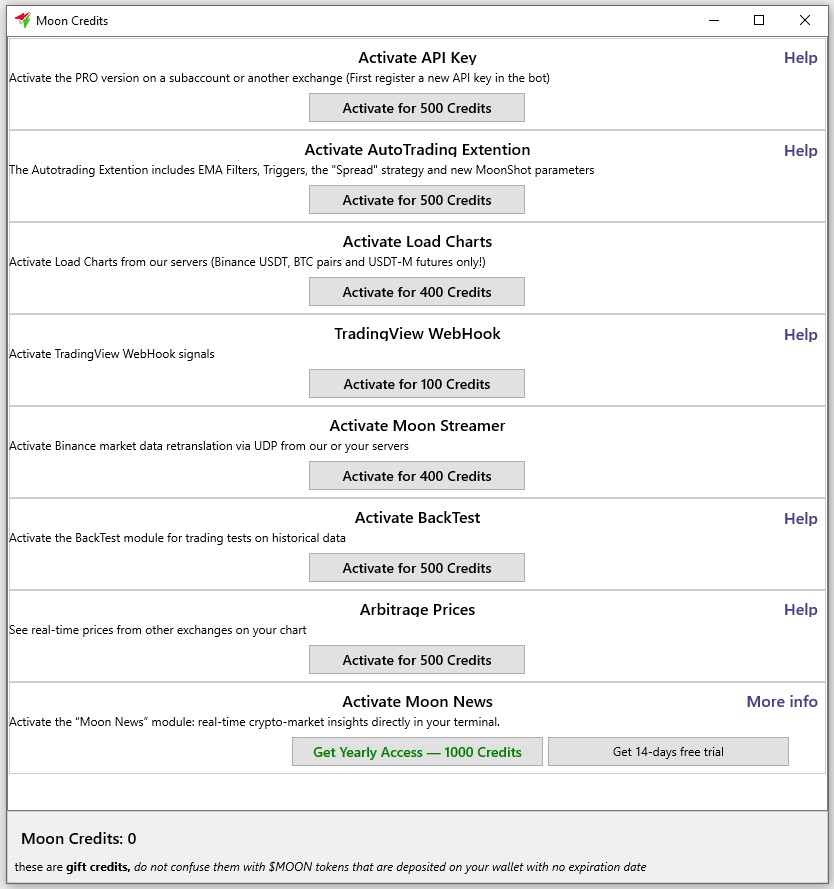
In the lower-right corner of the main window of the Moonbot terminal, click the PRO version label to open the Moon Credits window with activation of paid modules (see the figure below);
-
In the Moon Credits window, the lower section displays the balance of your Moon Credits; activating the main account or one subaccount requires 500 Moon Credits; if the balance is sufficient, in the Activate API Key block click the Activate for 500 Credits button — the API keys will be activated in this terminal;
-
If the message Wrong account is displayed, this means that the account was not registered via the referral link specified above;
-
If you need to activate additional subaccounts of the same exchange, repeat the procedure the required number of times.
Specific Features When Working with the Bitget Exchange
To connect and ensure proper operation of the terminal with the Bitget exchange, consider the following features:
-
When trading on the spot market, fees are paid in the special BGB coin; the discount is activated automatically by the terminal; additionally, check the discount status on the page 🔗 https://www.bitget.com/fee;
Also, in Settings → Advanced → Engine Settings, enable Auto buy BGB; the interface may display BNB, but in fact auto-buy of BGB will be performed; -
After launching the terminal, wait for leverage and maximum limits to load in the MarketsTable;
-
Note that there are no limits on the size of a single order; however, limits on the maximum position size do apply and are loaded together with leverage;
-
Follow API limits: 6000 requests per minute for all operations and 10 orders per second; protection against temporary blocking is not possible due to the short reset time of the limit;
-
The terminal uses some undocumented API functions, including an increased number of order book levels and subscription to all trades; the number of levels may be reduced if the exchange disables this functionality;
-
Funding Time via API is transmitted by a separate request for each trading pair; to avoid sending requests for all 700+ markets, Funding Time is requested for the BTC-USDT pair; if Funding Time differs on another market, the terminal will not display this in the current implementation;
-
For correct operation of balances on futures, enable multi-assets mode: open Menu → Assets, in the Assets window click the MultiAssets ON button;
-
Chart loading in the terminal is currently supported only for the futures market;
-
Bitget exchange servers are located in the following zones:
AWS Tokyo ap-northeast-1a (apne1-az4)
AWS Tokyo ap-northeast-1c (apne1-az1); -
Note that the balance on futures terminals is updated with a delay;
-
Iceberg order mode is not supported;
-
In the terminal, it is recommended to use only cross margin due to the specifics of isolated margin on this exchange. To disable automatic maintenance of isolated margin:
-
Click the Show markets button;
-
Click the Manage Leverage button on the MarketsTable;
-
Uncheck Auto Isolated
Even if you attempt to open a position with isolated margin, subsequent limit orders (including unfilled ones) may switch the position to cross margin mode.