Moon Kernel
The Moon Kernel module is a client-server technology that separates functionality when executing exchange operations: the client part (Moonbot Client) is configured on the user’s local computer, while the server part (Moonbot Kernel) is deployed on a dedicated VPS server.
This architecture is used for manual trading, helps achieve a more stable connection with the exchange, and significantly reduces ping, which affects order placement speed, stop execution, and other exchange operations. For automated trading, this architecture is not used; instead, it is recommended to run a standard Moonbot instance on a dedicated VPS server with the Moon Kernel module disabled.
The Moon Kernel functionality is available in the PRO version of Moonbot if the MoonBonus module is active — a bonus package of additional features provided to users who registered on exchanges using our referral links on the MoonBonus page.
Terms:
-
Moonbot Kernel (“Kernel”) or Moonbot Server (“Server”) — an instance of Moonbot installed on a dedicated VPS server and configured as the server-side component with a connection to the exchange.
Follow standard VPS recommendations: 1 Moonbot per 1 VPS; to do this, in Moonbot go to Menu → System settings → System settings window and enable the VDS Mode (optimization) option. -
Moonbot Client (“Client”) or Moonbot Terminal (“Terminal”) — an instance of Moonbot installed on the user’s local computer, configured as the client-side component with a connection to the Kernel.
To use the Moon Kernel architecture, you need to create two copies of the folder with the PRO version of Moonbot:
-
one copy place on a dedicated server (VPS) and configure it in Kernel mode;
-
another copy place on a local computer and configure it in Client mode.
Setting up Moon Kernel on the VPS side (Moonbot Kernel)
1. On the VPS, open a free UDP port for incoming connections in the Windows firewall.
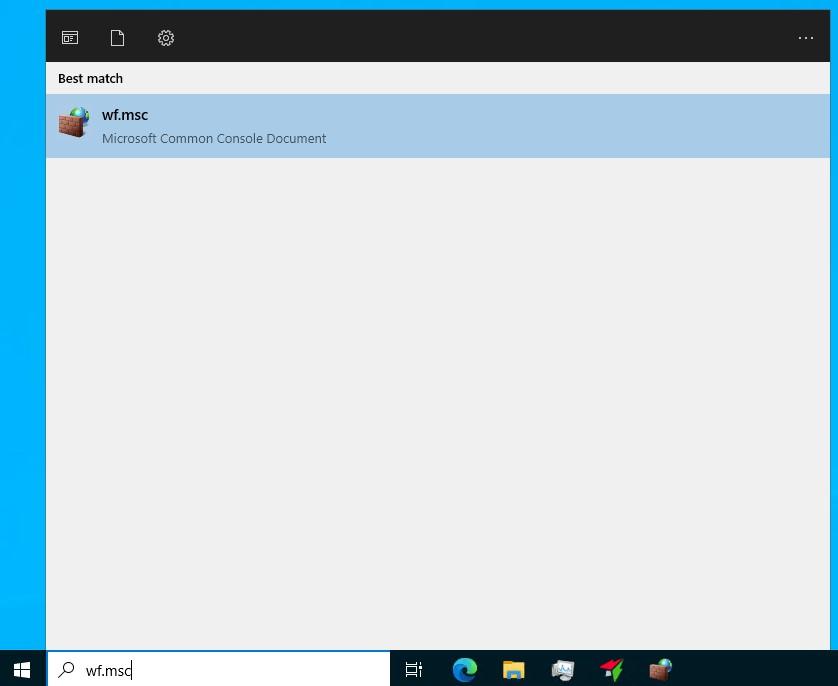
To do this, enter wf.msc in the Windows search field and run it to open the Windows Defender Firewall with Advanced Security window.
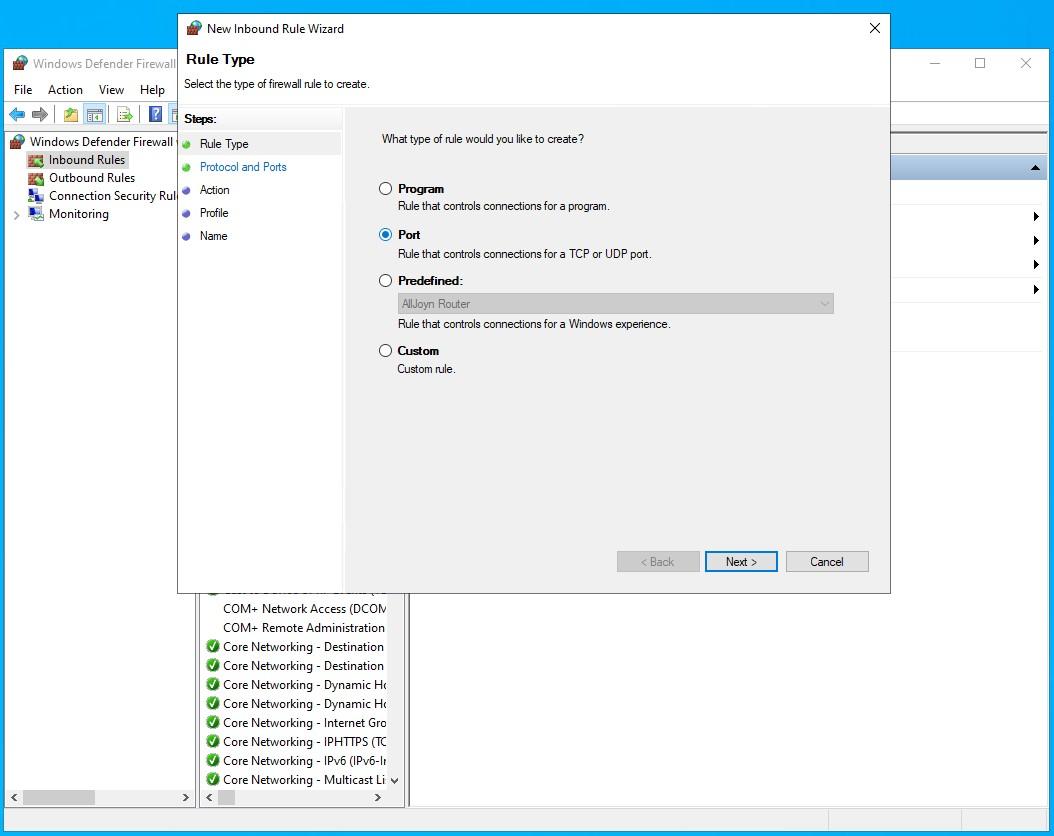
In the opened window, in the left panel click Inbound Rules, then right-click to open the context menu and select New Rule… — the New Inbound Rule Wizard window will open:

In the opened window, select the Port option and click Next:
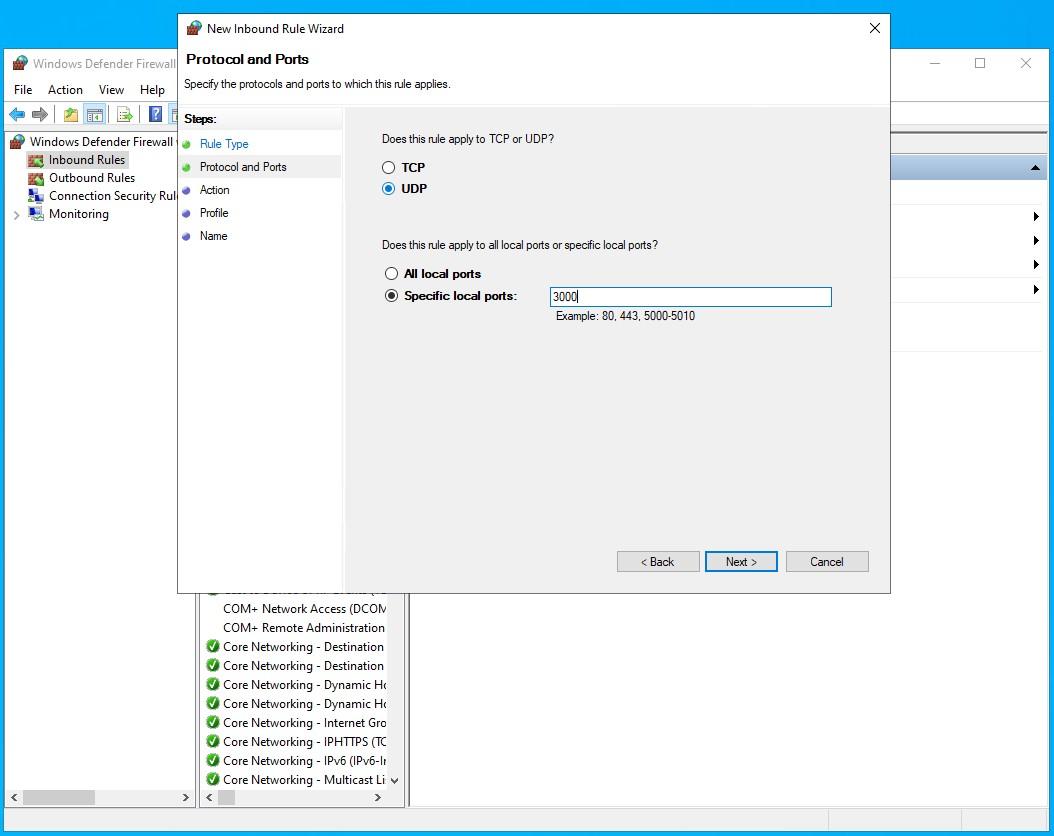
Then select the UDP option and enter a free UDP port number that you plan to open in the Specific local ports field, for example 3000, and click Next:
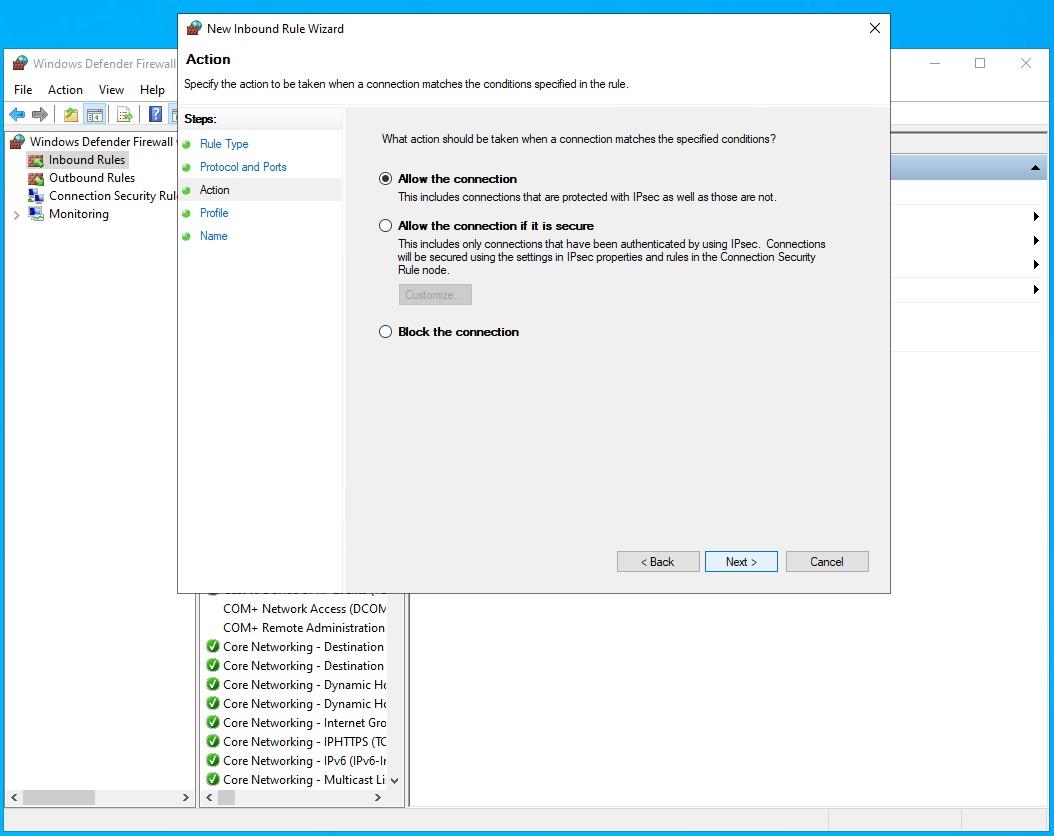
In the next window, make sure the Allow the connections option is selected and click Next:
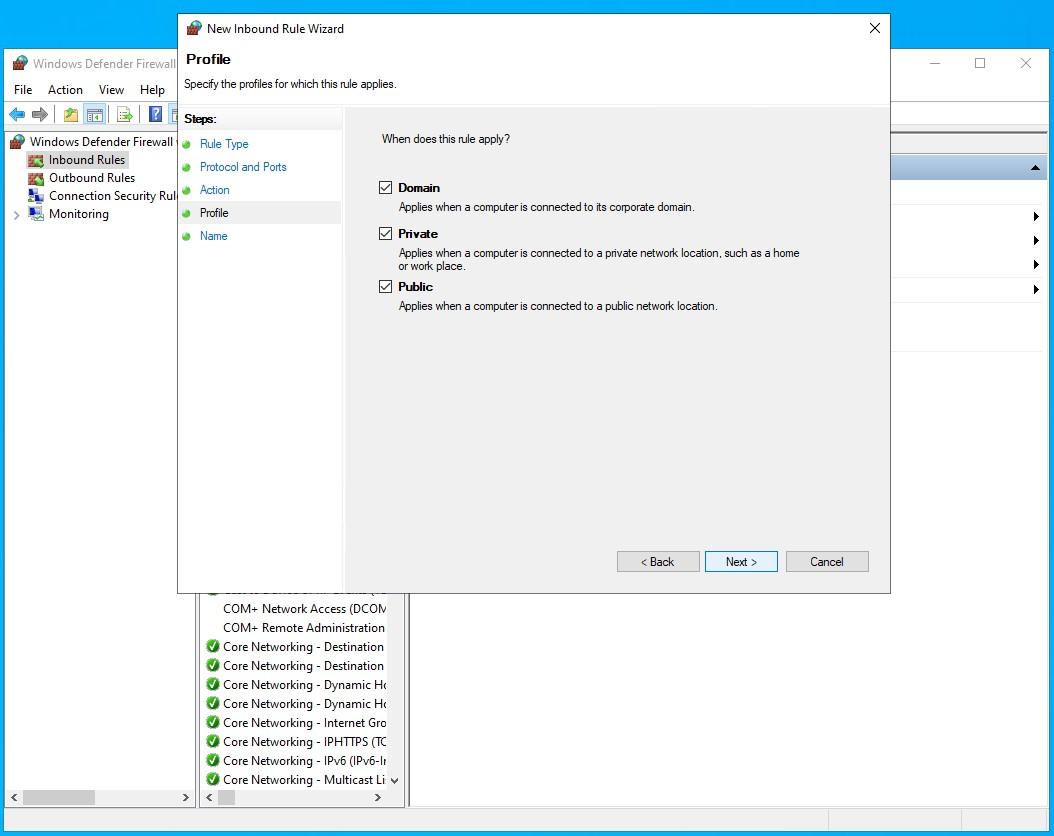
Then make sure all three checkboxes are selected and click Next:
Specify a rule name, for example UDP-3000, and click Next:
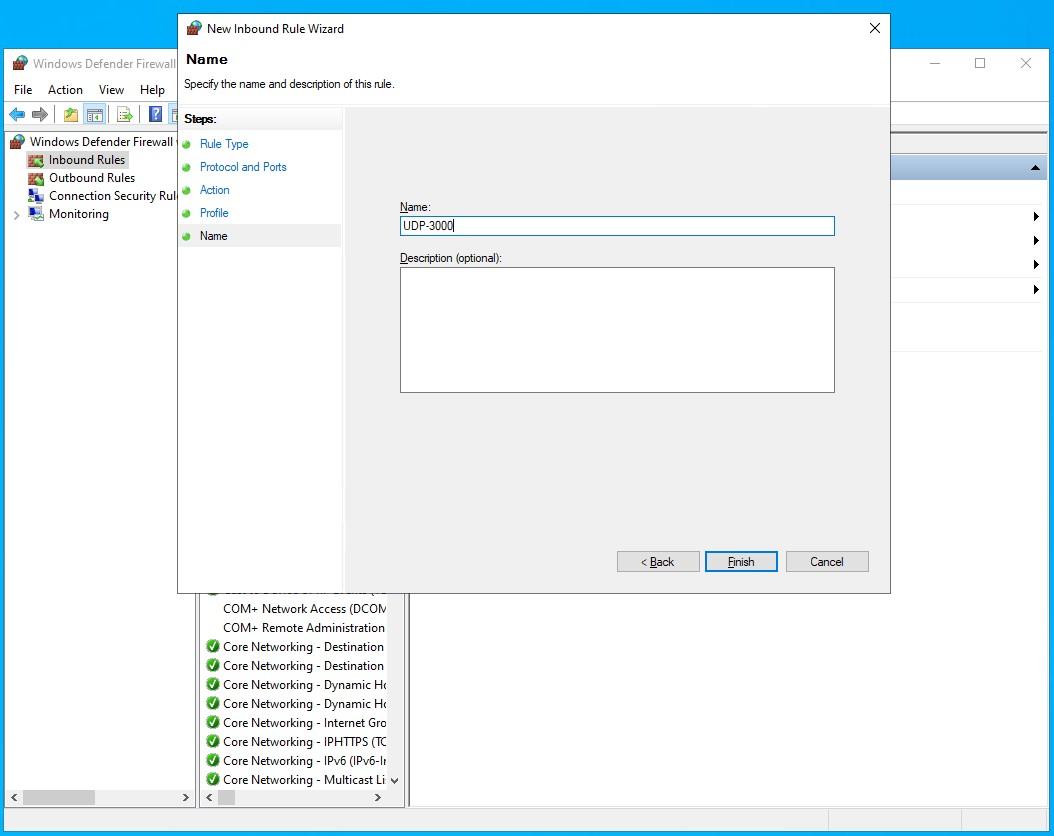

After that, UDP port 3000 on the VPS will be opened.
If necessary, you should also open the port in your VPS provider account (for example, this is required by Amazon).
2) Run a copy of the Moonbot PRO version on the VPS as administrator.
Open Menu → System Settings, in the System Settings window enable the VDS Mode (optimization) option, then restart Moonbot.
You can open the Moon Kernel settings window via Menu → Moon Kernel, or by left-clicking on the green connection indicator in the bottom-left corner of the main Moonbot window.
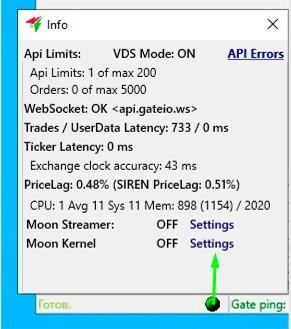
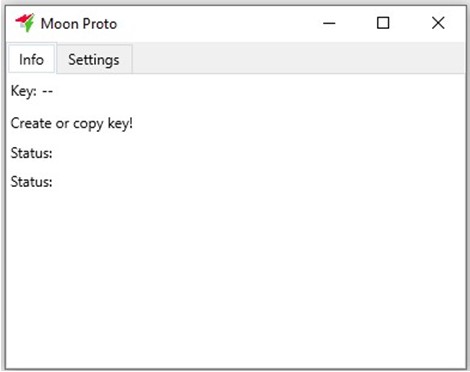
The Info window will open, and on the bottom line you will see the message Moon Kernel OFF Settings, which indicates that Moonbot is currently operating in normal mode and the Moon Kernel functionality is disabled.
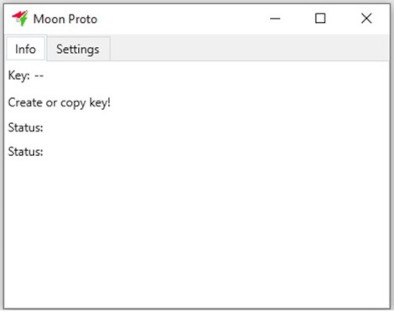
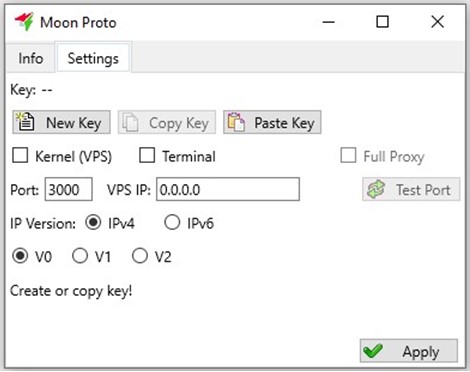
Click Settings to open the Moon Proto window, which contains 2 tabs:
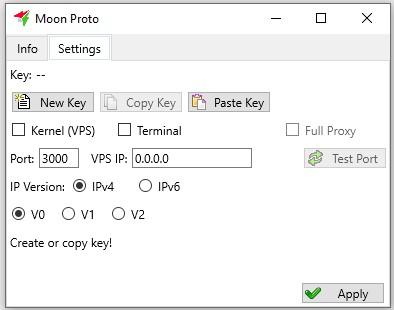
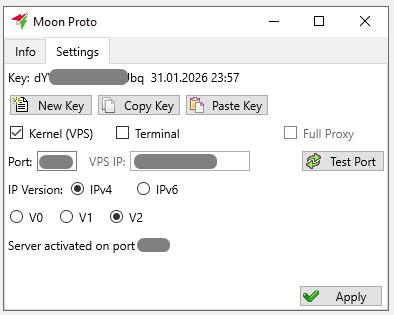
- The Settings tab with Moon Kernel configuration:
- The Info tab with informational lines:
In the Settings tab on the Moonbot Kernel (VPS side):
-
In the Port field, enter the UDP port number that you opened earlier (for example, 3000);
-
Select the IP Version IPv4 option;
-
In the VPS IP field, enter the IP address of the dedicated server;
After a successful connection via IPv4, you can later select the IPv6 option and enter the VPS IPv6 address if the provider supports this protocol version, as it improves performance. -
Select the V2 option;
-
Enable the Kernel (VPS) option;
-
Click the Apply button to apply the specified settings.
You can verify that the selected port is open by clicking the Test Port button.
The check is performed by pinging our server; if you opened the port but configured an IP whitelist for allowed access, the check will fail — this is not an issue, and in this case you can verify it later by connecting the Client to the Kernel.
If everything is configured correctly on the Kernel side, a green message Server activated on port 3000 will appear (in this example, for port 3000).
-
Click the New Key button to generate an access key for the Client;
-
Click the Copy Key button to copy it to the clipboard. The key can be saved in a text file or immediately pasted into the Moon Proto window on the Client (local computer).
As a result, the settings in the Moon Proto window on the Settings and Info tabs on the Moonbot Kernel side will look as follows:
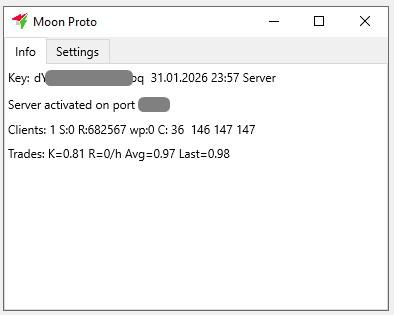
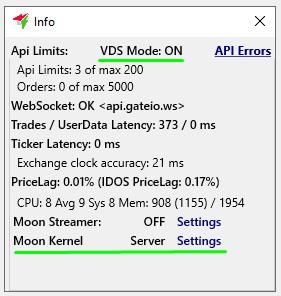
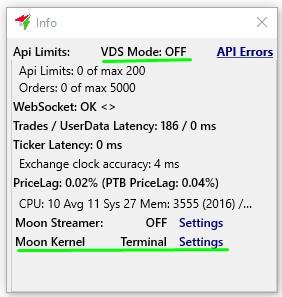
Also in the Info window, it will display VDS Mode: ON and Moon Kernel Server Settings, indicating that VDS mode is enabled and the server-side Moon Kernel functionality is active.
Configuring Moon Kernel on the local computer (Moonbot Client)
To configure a Moonbot instance as a Client, perform the following actions on your local computer:
1) Run a copy of the Moonbot PRO version as administrator;
2) Open the System Settings window via Menu → System Settings and make sure that the VDS Mode (optimization) checkbox is not enabled. If the checkbox was enabled and you disabled it, restart Moonbot;
3) To open the Moon Kernel settings window, left-click on the green connection status indicator circle in the lower-left corner of the main Moonbot window.
4) The Info window will open, and on the bottom line you will see the message: Moon Kernel OFF Settings, which indicates that Moonbot is currently operating in normal mode and the Moon Kernel functionality is disabled.
5) Click Settings to open the Moon Proto window, which contains 2 tabs:
- The Settings tab with Moon Kernel configuration parameters:
- The Info tab with informational messages:
6) In the Settings tab:
-
Click the Paste Key button and paste the key from the clipboard that you previously copied in Settings Moonbot Kernel;
-
In the Port field, enter the UDP port number that you previously opened on the VPS server;
-
Select the IP Version IPv4 option;
-
In the VPS IP field, enter the IP address of the VPS server;
After a successful IPv4 connection, you can later select the IPv6 option and enter the VPS IPv6 address if your provider supports this protocol version, as it improves performance. -
Select the V2 option;
-
Enable the Terminal checkbox;
-
On the Client side, it is recommended to enable the Full Proxy checkbox.
Note:
the Moon Kernel functionality on the Client side can operate in two modes: -
If the Full Proxy checkbox is enabled, then everything related to the exchange runs on the VPS in Moonbot Server (Kernel), while on the Client side in the user's Moonbot only the interface (visual display) is handled. In this mode, the Moonbot Client (Terminal) does not interact with the exchange at all. There is no need to whitelist IP addresses for the API keys added to the Moonbot Client (Terminal).
-
If the Full Proxy checkbox is not enabled, then order processing is handled on the VPS in Moonbot Server (Kernel), while everything else (charts, leverage, market deltas) is handled in the Moonbot Client (Terminal).
-
Click Apply to apply the specified settings.
If everything is configured correctly on the Client side, a green message Client: Connected! will appear.
If this message does not appear, then there are two possible reasons:
-
An error in following the instructions. Carefully repeat the setup step by step.
-
Traffic blocking.
In this case, if you previously had a connection using the V0 option, you should check the connection using the V1 and V2 options one by one as follows: -
First set the V1 option in the Settings of the Kernel on the server; change the UDP port there and then click Apply in the Settings of the Kernel on the server;
-
Then do the same in the Client Settings on the local computer;
-
If this does not help, then set the V2 option first in the Settings of the Kernel on the server; change the UDP port there again and then click Apply in the Settings of the Kernel on the server.
Additional check:
-
Make sure that the access keys in Moonbot Kernel and Moonbot Client are identical.
In the Moon Proto window, on the Settings tab, only the beginning of the key is visible, the full key is not displayed here - this part is only needed to visually confirm that the keys begin the same way; -
In the Moon Proto window, on the Settings tab of Moonbot Kernel, if the connection between the Kernel and the Client is successfully established, the R value (received packets counter) will increase;
-
Symptoms of traffic blocking: R increases slightly during the first connection attempt, then does not change. In this case, try connections using the V1 or V2 options, changing the UDP port each time you switch options.
Nuances:
-
It is not recommended to use VPNs or proxies (the Full Proxy mode should be sufficient);
-
If you still use third-party proxies, then with some of them, for example Proxycap, short connection drops are possible due to that proxy losing connectivity. Moonbot restores the connection automatically within a few seconds;
-
When Moonbot Client is updated on the dedicated server, Moonbot Kernel is updated automatically as well, including updates via the coin search bar in the main window to test and release versions.
-
The local computer on which the Moonbot Client is installed and the VPS server on which the Moonbot Kernel is installed must be set to the same time zone so that the funding time on the Moonbot Client is displayed correctly. Otherwise, the funding time on the Moonbot Client may be displayed as zero and remain unchanged.
-
Several Clients can be connected to a single Kernel.
-
During an auto-update, all Clients connected to a single Kernel are updated.
-
Synchronisation takes place between the Kernel and the Clients for various settings: leverages, V-Stop, triggers (in FullProxy mode), auto-start settings, "do not check position limits" and others.
As a result, if everything is configured correctly, the settings in the Moon Proto window on the Settings and Info tabs on the Client side will look as follows:

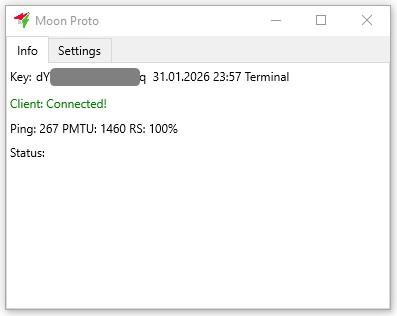
And the Info window will display: VDS Mode: OFF and Moon Terminal Settings, which means that VDS mode is disabled and the client-side functionality of Moon Kernel is connected.
Also, in Moonbot Client, when working with Moon Kernel functionality, ping data will be displayed (see the figure below):
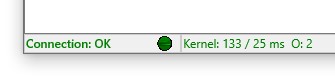
In the figure, “Kernel: 133 / 25 ms” means:
-
the first value 133 is the ping in milliseconds to Moonbot Kernel (one way);
-
the second value 25 is the order ping in milliseconds from the VPS itself (from Moonbot Kernel to the exchange).
Working with strategies when using the Moon Kernel module
It is not recommended to have more than 100 strategies in one Moonbot.
In both modes (with or without the Full Proxy checkbox), strategies operate as follows:
-
on the VPS in Moonbot Kernel: only strategies with enabled auto-buy AutoBuy=YES are executed — when activated, a yellow indicator light appears, as well as MoonShot strategies;
-
on the local computer in Moonbot Client: only strategies without auto-buy AutoBuy=NO — when activated, a yellow indicator light appears, meaning these are detection-only strategies.
Exception: Manual MoonHooks (paired strategies Manual+MoonHook) are also processed in the Kernel.
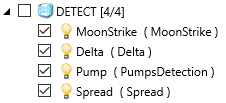
The order of light bulb color display in active strategies
-
All active strategies in Moonbot Client are displayed with blue lights;
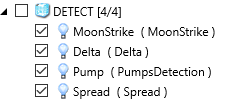
-
All active strategies in Moonbot Kernel are displayed with yellow lights.
Explanation:
Since all order operations are performed in Moonbot Kernel, strategies that execute trades also run in Moonbot Kernel.
The “source of truth” for settings is Moonbot Kernel on the VPS. If you enable a strategy from one Moonbot Client, it will also be enabled on other Moonbot Clients (for example, when launched from different locations or when running two Moonbot Clients simultaneously). If you make changes to a strategy in Moonbot Client, those changes are automatically transferred to Moonbot Kernel, and from there to other Moonbot Clients when they connect to Moonbot Kernel later.
If the strategy is active in the Moonbot Kernel, detects the coin and places orders, then this data is transmitted to the Moon Client for full control over trading.
If you turn off Moonbot Client while Moonbot Kernel continues to operate and execute trades, then after turning Moonbot Client back on, its report will not include the trades that were executed in the Kernel during the period when the Client was offline, meaning that after startup Moonbot Client does not automatically retrieve the report from Moonbot Kernel.